Kilimanjaro Base Camp Secrets: Best Routes to Conquer the Summit
Kilimanjaro Base Camp Secrets: Planning to climb Mount Kilimanjaro? This comprehensive guide to its base camps and trekking routes covers everything you need to know. Discover the best places to rest and acclimatise, explore key camp highlights, and learn how to choose the right route for a successful summit.
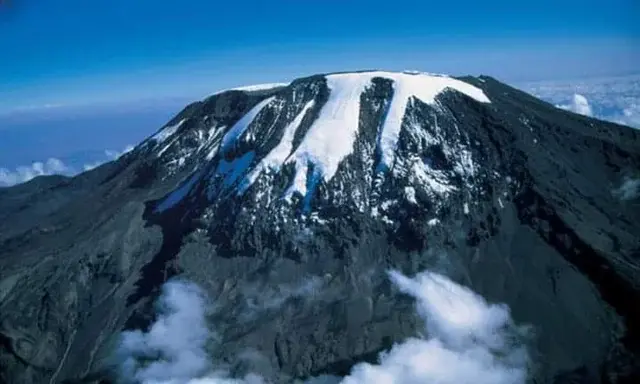
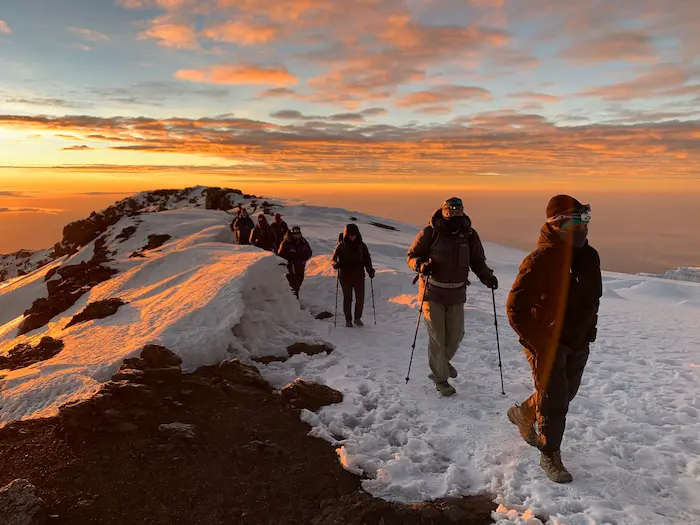
Mount Kilimanjaro isn’t just Africa’s highest peak; it’s one of the world’s most iconic trekking adventures. Located in Tanzania, the legendary “Roof of Africa” rises 5,895 meters (19,340 feet) above sea level. Its highest point, Uhuru Peak, commemorates Tanzania’s independence in 1961, “Uhuru” meaning freedom in Swahili. As the planet’s tallest free-standing mountain, Kilimanjaro is unmatched in both scale and beauty, making it a bucket-list climb for trekkers around the world.
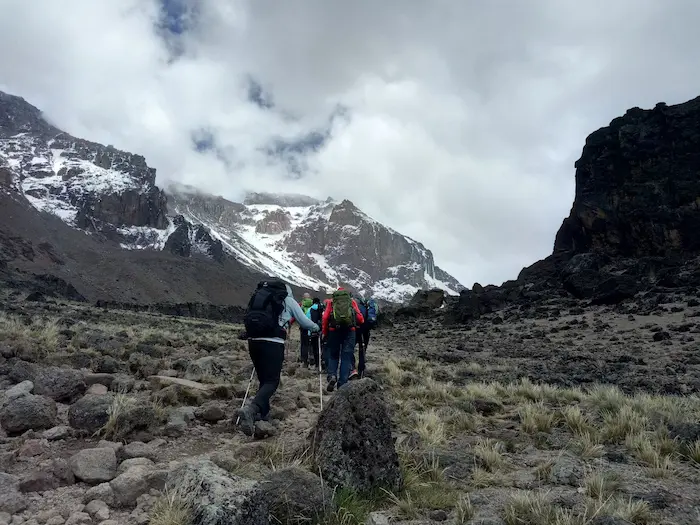
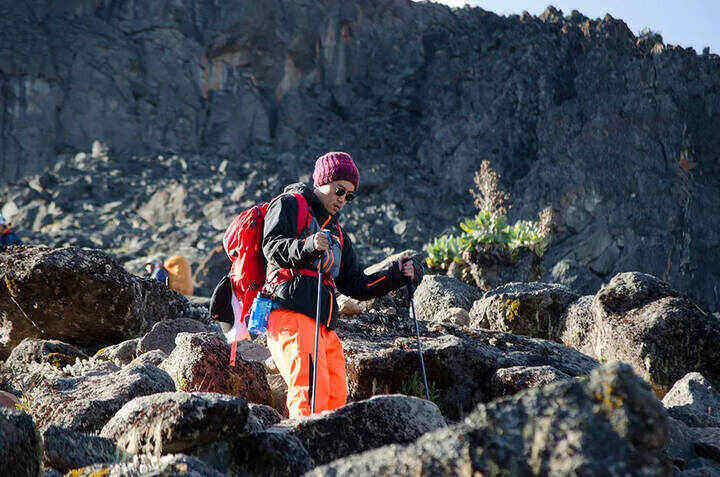
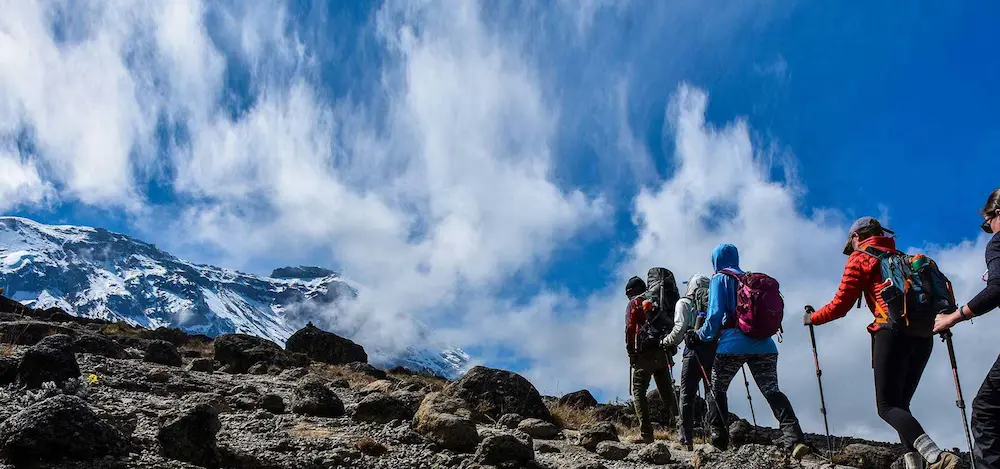
Climbing this incredible mountain is an immersive journey through dramatically changing landscapes, sweeping high-altitude panoramas, and the physical and mental challenge of reaching the top. But conquering Kilimanjaro requires more than determination. Success depends heavily on the route you choose and on the support you receive at Kilimanjaro’s well-designed boutique base camps.
Across all Kilimanjaro routes, there are more than 20 official campsites, each positioned to help trekkers rest, recover, and acclimatise. These base camps are not just overnight stops; they are strategic waypoints that shape your entire summit experience. Whether you choose the Machame, Marangu, Lemosho, or another route, understanding what each camp offers from the rugged character of Kibo Hut to the sweeping views from Barafu Camp is essential to planning a safe and rewarding climb.
Every year, nearly 30,000 climbers attempt to reach Uhuru Peak. Yet, despite the excitement and preparation, almost half never reach the summit. Surprising, isn’t it? Especially because Kilimanjaro doesn’t require technical climbing skills. The real challenge is altitude, and one of the biggest reasons trekkers fail is choosing a route that ascends too quickly. Many opt for the short Marangu Route, just five days round-trip, without realizing it provides limited time for acclimatisation.
The proven key to a successful summit?
Choose a longer Kilimanjaro route with a gradual ascent. This strategy dramatically improves your chances of reaching the top and allows you to fully enjoy Kilimanjaro’s incredible landscapes along the way.
This guide will introduce you to Kilimanjaro’s most important base camps and explain what makes each one unique. From high-altitude expedition camps perched above the clouds to scenic waystations offering unforgettable sunset views, you’ll discover why these rest stops aren’t just places to sleep, they’re an essential and unforgettable part of your Kilimanjaro adventure.
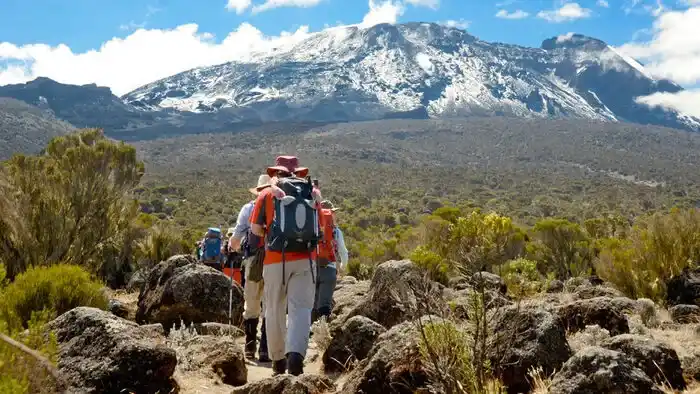
Kilimanjaro Trekking Routes: Easiest to Hardest
Mount Kilimanjaro offers several trekking routes, each differing in difficulty, scenery, acclimatisation profile, and overall success rate. Choosing the right route is one of the most important decisions for a safe and rewarding ascent. Below is a breakdown of the main Kilimanjaro routes from easiest to most challenging.
1. Marangu Route (Coca-Cola Route)
One of the communal huts on the Marangu Route
The Marangu Route, famously known as the “Coca-Cola Route,” is the oldest and most established trail on Kilimanjaro. Its well-maintained paths and gradual ascents through rainforest, moorland, and alpine desert make it one of the easiest ways to reach the summit. This route is unique as it is the only trail offering hut accommodation rather than tents.
However, Marangu’s rapid altitude gain can affect proper acclimatisation, which may result in lower summit success rates. Both ascent and descent follow the same path, meaning you’ll encounter other trekkers along the way. While it is beginner-friendly, first-time climbers may find the quick altitude changes challenging.
Route Highlights:
- Difficulty: Easy to Moderate
- Duration: 5–6 days
- Distance: ±82 km (50 miles)
- Best for: Comfort and accessibility
- Accommodation: Mountain huts
- Starting Point: Southeast
- Summit: Via Kibo Hut
Marangu is ideal for climbers seeking a more structured and comfortable trek with the support of mountain huts along the way.
2. Rongai Route
Mawenzi Tarn Hut on the Rongai Route
The Rongai Route is Kilimanjaro’s only trail approaching from the north, making it drier and an excellent choice during the rainy season. Less crowded than the western routes, it offers stunning views of Kenya and a sense of solitude for trekkers seeking a quieter climb.
The path passes through moorlands and alpine desert, with a moderate difficulty level and a gradual ascent that supports better acclimatisation. The descent follows the Marangu Route, so you’ll experience a different perspective on the way down. While Rongai is peaceful and less trafficked, it is slightly less scenic compared to western routes like Machame or Lemosho.
Route Highlights:
- Difficulty: Moderate
- Duration: 6–7 days
- Distance: ±79 km (40 miles)
- Best for: Quieter trekking and drier conditions
- Accommodation: Tents
- Starting Point: North (near the Kenyan border)
- Summit: Via Kibo Hut
Rongai is ideal for trekkers who value tranquillity, gradual acclimatisation, and a northern approach that avoids the busier trails.

3. Machame Route (Whiskey Route)
The Machame Route, often called the “Whiskey Route,” is one of the most popular and visually striking ways to climb Mount Kilimanjaro. It is more challenging than the Marangu Route, but it rewards hikers with exceptional scenery and excellent acclimatisation opportunities.
This route takes you through diverse landscapes starting in lush rainforest, moving into heather and moorland zones, and eventually reaching the dramatic alpine desert and rocky ridges near the summit. Though it includes steep, demanding sections, the daily elevation gain is well-designed, giving climbers a strong chance of successfully reaching Uhuru Peak.
The descent is made via the Mweka Route, commonly used by adventurous trekkers seeking a successful and memorable Kilimanjaro experience.
Difficulty: Moderate to Hard
Duration: 6–7 days
Distance: 62 km (38 miles)
Best for: Scenic diversity and strong acclimatisation
Accommodation: Tents
Starting Point: Southwest
Summit Approach: Via Barafu Camp

4. Lemosho Route
The Lemosho Route is widely regarded as one of the most beautiful and enjoyable trails on Mount Kilimanjaro. Known for its peaceful atmosphere and excellent acclimatisation profile, it begins in the remote western rainforest before crossing the stunning Shira Plateau. The route later merges with the Machame Route at Shira Camp, continuing along the scenic southern circuit toward the summit.
Although longer and physically demanding, Lemosho rewards trekkers with exceptional landscape variety rainforest, moorland, high-altitude desert, and dramatic ridgelines. Its lower traffic and immersive wilderness setting make it a top choice for climbers seeking a quieter and more enriching trekking experience.
Key Details:
- Difficulty: Hard
- Duration: 7–8 days
- Distance: 70 km (43 miles)
- Best for: Extended acclimatisation and panoramic views
- Accommodation: Tents
- Starting Point: Western base
- Summit Approach: Via Barafu Camp
5. Northern Circuit
The Northern Circuit is Kilimanjaro’s longest and newest established route, offering the most comprehensive exploration of the mountain. Known for its exceptional acclimatisation profile, this trail circles around the quieter northern slopes of Kibo, providing wide-ranging views and a peaceful trekking experience. Starting on the western side, it follows the same initial path as the Lemosho Route before branching north across remote and less-travelled terrain.
Because of its extended duration, the Northern Circuit significantly reduces the risk of altitude sickness and boasts one of the highest summit success rates of all routes. While physically demanding, it is ideal for trekkers seeking maximum acclimatisation, scenic diversity, and a truly immersive journey around Kilimanjaro.
Key Details:
- Difficulty: Very Hard
- Duration: 8–9 days
- Distance: Approximately 96 km (59 miles)
- Best for: Comprehensive mountain experience and optimal acclimatisation
- Accommodation: Tents
- Starting Point: Western side
- Summit Approach: Via School Huts Camp

6. Shira Route
The Shira Route begins at a high altitude, offering a unique and challenging start that demands careful acclimatisation. Similar to the Lemosho Route, it crosses the Shira Plateau and joins the Machame Route at Shira Camp. Trekkers are rewarded with rugged landscapes, expansive views, and a sense of adventure from the very first day. Due to its early high-altitude start, this route is best suited for experienced hikers who are prepared for a physically demanding trek.
Key Details:
- Difficulty: Very Hard
- Duration: 7–8 days
- Distance: Approximately 56 km (35 miles)
- Best for: Scenic beauty and adventurous trekkers
- Accommodation: Tents
- Starting Point: West (Londorossi Gate)
- Summit Approach: Via Barafu Camp
7. Umbwe Route
The Umbwe Route is Kilimanjaro’s shortest and steepest trail, offering a direct path to the summit with rapid altitude gain. Known for its challenging terrain, this route requires minimal acclimatisation, making it suitable only for experienced trekkers with excellent physical fitness and high-altitude experience. While the trail features breathtaking scenery, its difficulty and lower success rate make it generally recommended for seasoned climbers or those seeking a faster summit approach.
Key Details:
- Difficulty: Extremely Hard
- Duration: 6–7 days
- Distance: 53 km (32 miles)
- Best for: Experienced climbers seeking a high-challenge adventure
- Accommodation: Tents
- Starting Point: Southern side
- Summit Approach: Via Barafu Camp
Which Kilimanjaro Route Is Best for You?
Choosing the right Kilimanjaro route depends on your fitness level, trekking experience, and the amount of time you have for proper acclimatisation.
- Marangu Route and Rongai Route are the easiest, ideal for trekkers who prefer comfort or a quieter climb.
- Machame Route and Lemosho Route offer a balance of challenge and breathtaking scenery.
- The Northern Circuit is ideal for those seeking a longer, more immersive adventure with optimal acclimatisation.
- The Umbwe Route is the ultimate challenge for experienced climbers seeking a steep, demanding route.
No matter which route you choose, careful preparation and selecting an itinerary that matches your ability will maximize your chances of reaching the summit and fully enjoying your Kilimanjaro adventure.
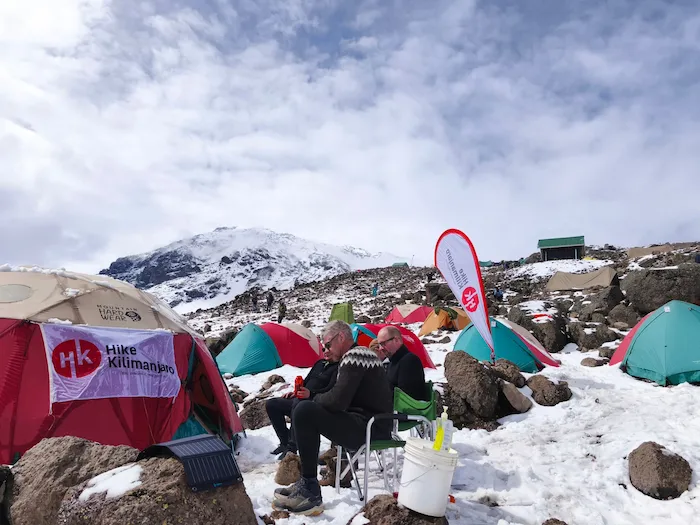
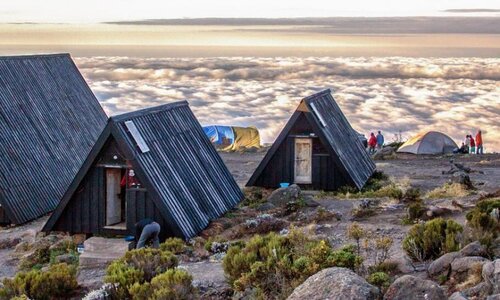
Detailed Look at Kilimanjaro Base Camps
Experience the essence of Mount Kilimanjaro through its essential base camps. Each camp serves as a strategic resting and acclimatisation point, helping climbers prepare for the summit while offering unique landscapes and experiences.
1. Barafu Camp: Kilimanjaro’s Ice Camp
Elevation: 4,670 metres (15,320 feet)
Associated Routes: Lemosho, Machame, Umbwe
Unique Aspects: ‘Barafu’ means ice in Swahili, reflecting the camp’s cold and often icy conditions. Strategically positioned for summit attempts via three popular routes.
Features and Amenities: Tented camps on rocky ground with spectacular views of Mawenzi Peak and Kibo.
Best Time to Stay: Typically a short rest before the midnight summit push.
Importance in the Trek: Final base camp before reaching Stella Point (5,739 m).
Experience and Surroundings: Harsh, cold, and windy, but rewarding with panoramic mountain views.
2. Kibo Hut: The Gateway to Gilman’s Point
Elevation: 4,700 metres (15,420 feet)
Associated Routes: Marangu, Rongai
Unique Aspects: Southeast side of Kilimanjaro, offering basic dormitory-style huts rather than tented accommodations.
Features and Amenities: Huts for sleeping, a dining hall, toilets, and basic shelter.
Best Time to Stay: The night before the summit push via Gilman’s Point (5,685 m).
Importance in the Trek: Ideal for climbers seeking more shelter than tents.
Experience and Surroundings: Stark, moon-like landscape with clear night skies perfect for stargazing.
3. School Huts Camp: The Northern Approach
Elevation: 4,750 metres (15,580 feet)
Associated Route: Northern Circuit
Unique Aspects: Quieter, less crowded than Barafu or Kibo, offering a more remote experience.
Features and Amenities: Basic huts and tent spaces in the alpine desert zone.
Best Time to Stay: Final overnight on the Northern Circuit, usually less crowded.
Importance in the Trek: Balances acclimatisation with summit proximity.
Experience and Surroundings: Rugged and remote with a strong sense of solitude.
4. Kosovo Camp: A Head Start on the Summit
Elevation: 4,870 metres (15,978 feet)
Associated Route: Lemosho (via Barafu)
Unique Aspects: Slightly higher than Barafu, providing a head start for summit night.
Features and Amenities: Limited tent space; cold and exposed, but quieter than Barafu.
Best Time to Stay: Used as an alternative to Barafu for early summit starts.
Importance in the Trek: Helps reduce crowd congestion at Barafu.
Experience and Surroundings: Harsh conditions but ideal for climbers who want to minimise nighttime hiking.
5. Crater Camp: The Ultimate High-Altitude Camp
Elevation: 5,800 metres (19,029 feet)
Associated Route: Lemosho
Unique Aspects: The highest camp on Kilimanjaro, located within Kibo’s volcanic crater.
Features and Amenities: Camp amidst glaciers and ash pits; extremely cold with minimal facilities.
Best Time to Stay: Recommended only for highly acclimatised climbers.
Importance in the Trek: Offers a once-in-a-lifetime opportunity to sleep near Africa’s summit.
Experience and Surroundings: Breathtaking views, but high risk of altitude sickness; a rare and challenging overnight stop.
Significance of Base Camp Elevation
The elevation of each Kilimanjaro base camp plays a critical role in climbers’ health and summit success. Higher camps increase the risk of altitude sickness, making proper acclimatisation essential. Strategically planning which base camps to stay at, and for how long, can significantly improve your chances of reaching Uhuru Peak safely and successfully.
Choosing the Right Base Camp on Kilimanjaro
Selecting the right base camp on Kilimanjaro is crucial for balancing comfort, acclimatisation, and summit success. Each camp provides a unique experience, from the bustling Barafu Camp to the peaceful and remote School Huts Camp. Your choice should reflect your physical fitness, acclimatisation needs, and preferred trekking route. Kilimanjaro also supports a vibrant trekking community, generating up to 11,000 jobs in Tanzania. This sustainable tourism initiative ensures that your adventure contributes positively to local communities while providing an unforgettable climbing experience.
Best Times to Climb Kilimanjaro
July to October: Ideal Weather with High Traffic
This period is the most popular for climbing Kilimanjaro, offering a balance of excellent trekking conditions and clear skies. Rainfall is minimal, around 0.8 inches (20 mm) over 30 days, providing breathtaking views across Tanzania’s diverse landscapes. However, this is also peak season, and popular routes such as Machame can become crowded. Traffic is heaviest in July and August due to European summer holidays, tapering off gradually in October. Nights can be sub-zero, so climbers should prepare for cold temperatures at high altitudes.
January to February: Warm and Less Crowded
Between the short and long rainy seasons, January and February are ideal for those seeking warmer conditions and quieter trails. The weather is generally dry, making trekking more comfortable, and the trails are less busy since this period does not coincide with major European or US holidays. Mornings are typically clear, though clouds and heat haze may develop by early afternoon, occasionally affecting summit views.
Choosing the right base camp and timing your climb are crucial for a successful Kilimanjaro expedition. Whether you prefer the bustling energy of Barafu Camp or the serenity of School Huts Camp, aligning your selection with your fitness level and trekking goals is key. Planning your trek during favorable seasons can enhance your experience, offering optimal weather, manageable trail traffic, and a higher likelihood of summiting successfully. With proper preparation, your Kilimanjaro adventure can be both safe and unforgettable.
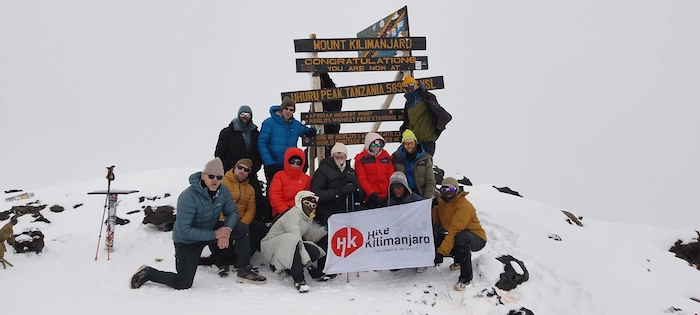
Start Your Tanzania Safari or Kilimanjaro Trek Today
Travel with confidence and experience Africa with one of Tanzania’s most trusted local operators. At Hike Kilimanjaro, we deliver expertly crafted safaris and high-success Kilimanjaro climbs designed for comfort, safety, and unforgettable memories.
From iconic wildlife experiences to summiting Mount Kilimanjaro, we take care of every detail so you can focus on the adventure.
👉 Get your custom itinerary and best price today: Contact Us
👉 Prefer instant replies? Chat on WhatsApp
Share Your Article:
Make your dream trip come true with Hike Kilimanjaro Ltd.

5/5
Based on 200+ reviews
Book Your Discounted Adventure Today!
Customize your dream trip with Hike Kilimanjaro. Explore our Kilimanjaro treks and top Tanzania safari packages, designed for comfort, safety, and unforgettable experiences.
Related posts
These full and frank reviews are from travelers who have traveled with Hike Kilimanjaro previously. The reviews and experiences shown here are from reputable travel websites like TripAdvisor, Google, Facebook, and Trust Pilot, etc.
Speak to an Expert
Need assistance with your booking? Our friendly Tanzania-based expert team is here to help. Feel free to reach out with any travel-related questions or concerns.

Maxon

- WhatsApp +255 692 406 444